Moko-Young's Factoid Firefly album on Photobucket

Thursday, October 31, 2013

Special Shout-Out To: We Draw Animals

Upon being given special permission I'm going to both give a shout-out and put in my "Programs and People I Recommend" side bar this website!


http://www.wedrawanimals.com/


"We Draw Animals" has at this moment around 200 hundred tutorials on drawing different animals, it goes from the level to a young child around the age of 4 up to the average person who wants to learn how to draw animal figures. It ranges quite far touching on fish, insects, mammals, and more! - The website also provides some "Fun Facts" about the animal you're about to draw to add some extra fun and flare!

I hope you enjoy and learn from the site as much I do!

Link can be quickly found in the side bar of the blog.

We Draw Animals Facebook
We Draw Animals Official Web Site


~ God Bless ~

~ Firefly

Wednesday, October 30, 2013

My Current Process in Designing a Character! - Part Two:

This is Part 2 of my blog post about character design!
In this post I'll show you how I've applied some of my tips!

Part One Can Be Found Here!


Lets continue!

Here is my Character Benoni; His name means "Sorrowful".
I picked this name because when he was a younger Scarecrow some sad and traumatic things happened to him and now he's angry and bitter. - I picked first the name "Papa Crow" because he's the oldest scarecrow on the farm he lives on, but then I got more in to designing him and he's better fit as "Benoni" because of his history the name fits better.

Next after some sketches on paper I drew this chart in GIMP:


A few days later I made this "loose" Expressions chart; Then I colored in the chart using MyPaint and GIMP.


See how the chart helped me in the coloring? I forgot to add the stitches around his face, but then I looked at the chart and remembered! Oh wait! I forgot! The coloring also added depth that a chart can't. And, I added symbolism! The Blue buttons represent sadness to go with the name "Sorrow".
And what makes him different from other scarecrows? Well, he's got a hat with 3 different colored leaves, his button eyes have the holes pointing inward to almost make him look cross-eyed and his hay-hair tuft in the middle makes him look a bit unique.

Bigger Version

To be more exploring I tried coloring in another style which is more cartoon like, I think this one looks better even if I like the coloring of the first version!


Here is the 3 styles I tried trying to find the best representation; Non hard-lined, Outlined, and Cartoon. - I've been given the most support for the 3rd, and after a bit of vacation from this character I'm starting to prefer that version as well.

Bigger Version


I've written and extensive history on this Character but I'm not going to get in to it, but his history reflects a bit in his look. I haven't gotten to his body so I'll show another character for that.

Okay, lets meet Paisley the Bengal Tiger!

Her name is to represent her use, she's meant to represent the Middle-East, and Paisleys are common around the Indian areas of Asia, her clothes are inspired from the colors and designs of middle-eastern dress, more namely in South Asia; Her hair also to show the beauty of the fashion of that area, and of course, she's a Bengal tiger! Quite prominent not only on Bangladesh but also in India and other countries in that area.


Notice how I purposly made her have a very fluid pose, and happy expression.
She's instantly likeable! ( I hope!)

Bigger Version

Now look at this figure I drew a few years ago, she's a dancer so she should be very "curvy" in her figure because of the occupation and pose of her body. - But instead, she's kinda tense looking.

Bigger Version


So in the end for my method we have to:


  1. Brainstorm And Create!
  2. Name The Character!
  3. Give the Character a Personality!
  4. Draw out Emotions!
  5. Get a method to help redraw the characters!
  6. Color! 
  7. Keep Figures Fluid and Alive!


I hope these posts were helpful! Feel free to ask questions if I didn't make something clear.

Now get out there and design a character!


May God Bless You, Your Family, Friend; Along With The Health Of Yourself, Family, Friends, And All Who Know You. ~ Amen


~ Firefly


Useful Links:

Would You Like To Read More Blog Posts Similar To This One? Take A Look At The Official Blog Archive.
Would You Like To See My Drawings? Click here.

Have A Question?
Ask The Firefly!

My Current Process in Designing a Character! - Part One:

My Current Process in Designing a Character! - Part One:


In Tip of the Week 2 I said design a new Character! I myself struggle making a character and also look for that perfect instruction guide in teaching me the magic zen of the perfect Character, and although I haven't found THE ONE! I have found some commonly said tips and thought I'd share with you some of those tips along with what I've come up with so far in my own method.

My Method:


Step 1: Brainstorm! If you don't already have a character in mind (from a story in your mind or such) you can do and exercise that Children's Comicbook Writer and artist Dave McDonald does and draw a random shape then give yourself 15-30seconds and draw a character. It's not to be a perfect character, just to give you an idea. If you're in to more detailed styled art and 30 seconds isn't enough for a full character just start with the face. You don't have to like everything you do, it's just to give you some ideas where to start!


Step 2 and 3: I put these together because depending on who you are you might want to interchange these steps.

  • 2: Name your character. -Some people wish to give their characters names based off of their personality or life story. Like,you might have a Character that has to heal from a tramaic event and name them "Raphael" Which means " (the)God who heals". Or Maybe a a girl with a bitter past you might name her "Mara" which means bitter sea. 

  • 3: Give your character a personality, what do they like? what do they not like? Are they a he or she? Do they have an agenda? Many other questions you can ask, depending on the reasoning for the Character you might want to write an actual chart that looks something like this:

__________________________________________________________________
Name: Kole Shimska
Age: 28
Likes: Ice-cream, sleeping, books, sleeping with books, cats, and her pet hamster Dimitri Jose.
Dislikes: People who tease her glasses, singing in public, being active, being late.

Life Story: Kole is from  Moscow Russia but lives in Columbia, she grew up without glasses but had an accident that makes her need glasses when she was 15. Kole Graduated from University when she was 20 and has an above average IQ and often annoys her one and only friend with saying random facts. She's often sad and lonely books and her hamster acting as her friends, since her only real friend lives far away and she can't always see him.
__________________________________________________________________
This isn't an actual character of mine, just an example of what you can do!

You could even add her hair, skin and eye color in the profile just to keep organized if you like!
Or if you want to get super super specific, write down the color codes/names to your colored pencils or markers (or other media) so you can exactly recolor your character over and over again. If you use digital you might want to make a color swatch and put the code number in it for double security (although the color select tool in your preferred program should find the color for you. )


Step 4: Play with expressions, even if you have an always happy or always sad character, we all know life isn't always in one state mind forever. And you get to know your characters better when you see how they look sad or happy or a bit tiffed about something! I'd say do the main 4 Expressions to start but surly do as many as you want!

The Main 4 would be:

  • Happy
  • Sad
  • Angry
  • Shocked
Each of these have level of emotion, one can be sad because they lost a game but won't cry about it, and another can be sad because their cat was stolen and cry their eyes out! Or one can be a bit irritated they lost the game but super angry when they cat was stolen! And so on it goes...I think you get the point! - If you want to add a 5th I'd say "shy" would fit, but it depends on your view of life and stuff so, just have fun making different expressions!

Once you've done that, keep a polished chart of your character's expressions so you can duplicate it a bit easier!

Also remember That the human body also has a lot of expression; A couple in love as they look at each-other's eyes appear soft, vulnerable, happy and relaxed, an angry person is quite tense and holds stuff down or is exploding in much action, a sad person is a bit saggy in bodily expression and etc etc etc!

Step 5: That oh so painful reality, I have an epic character, perfect name and personality...But, oh no! I can't draw the same character two times! What do I do?

Get a System:

Well, I myself haven't mastered the perfect method for this but in my "research" over the past few weeks, I came across a tip from an up and coming artist that said to make a system of in what order do you draw the character; Do you draw the eyes, nose, then mouth? Or...Head shape then face? Or, do you draw whole body and leave the details of the head and face for last? Get a system! It's a bit hard for me since I go where I want as I draw but if you got the discipline this could be pretty helpful! And even if you don't, spite yourself and try it anyway, do you wanna be comfortably not as could as you could be or work and be better?! Go moving solider! We got work to do!

Create a Chart:

One thing I have done is create a chart of the sketch, this could be done best on the computer in my opinion so you don't scuff up the original sketch. Say what makes this character unique, what stands out about him/her/it, and keep the chart as a reference!
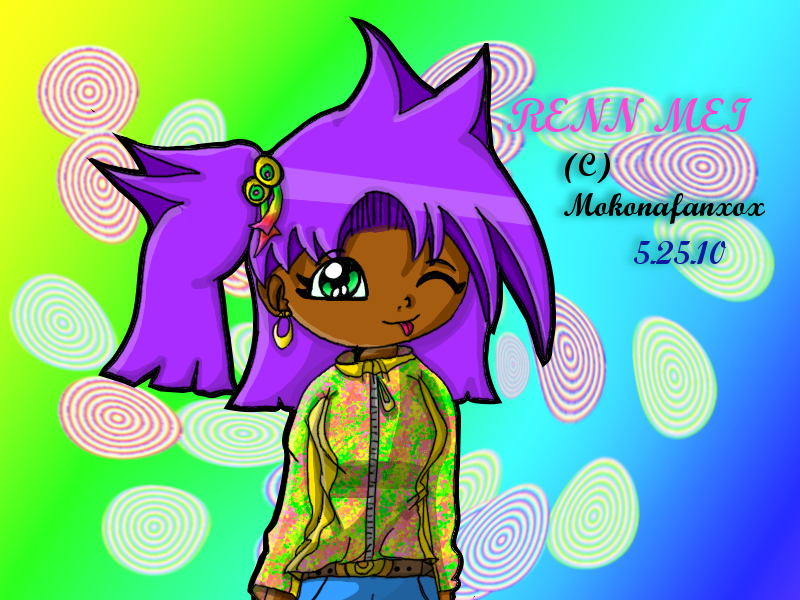
Here's an Example:

Bigger Version

 See how it explains the ins and outs of this character's face! It even has a few notes on the bottom to remind me of things that explain why he's this way. - A chart might help you too! And do it with the body as well, note the shape, how tall using the head as a measurement, maybe even measure with a ruler and say how big each thing is to  make it perfectly exact!

Step 6: Color! Color! Color! 
Even if you don't color well or have "good" materials, that's fine! The Majority of my art supplies are children's pencils and markers. Coloring a character adds a new dimension! There is much color symbolism in the world, and you can create your own symbolism! For example: Red can mean evil or energetic, blue can mean calm and collected or sad or loneliness, yellow can mean cheerful and on and on it goes! How you look at color might and probably is a bit different than mine, just have fun with it! Play with patterns, play with designs, it doesn't have to look like a pro it just has to be fun! If you're not having fun with it and you're not being payed/have to do it you shouldn't do it! Have fun!
Aim to be the best but don't give up just because you're not there yet! You think Micheal Angelo got there over night? If he did I want his coffee cause that boy got it right!  Even the best were bad at one point it's fine, just keep going, aiming, having fun!

Even if you want to work in black and white, I think having 1 solid either very best you can do image, or a chart could help you immensely.


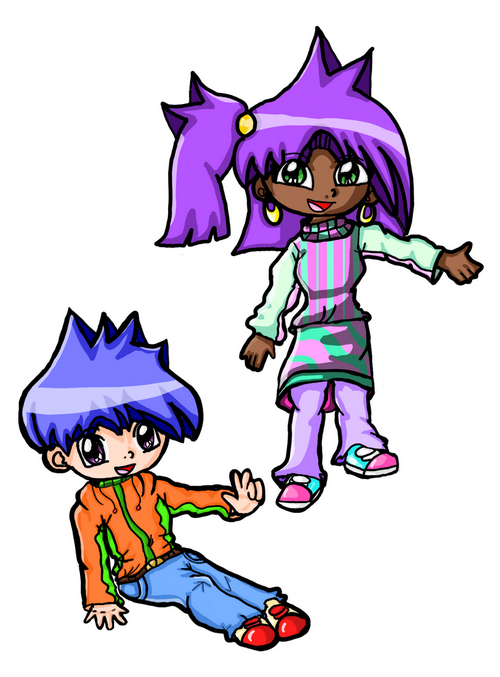
Step 7: Keep Figures looking flexible and alive!
Maybe you want to draw cartoons that are simple, or very extravagant figures but still, to make them look lively a good figure structure is essential! I don't suggest to go buy books, find a model to pose w/o clothes on or anything of the sort, there are pleanty of charts on the internet that are "clean" and have lots of tips.
 

 This one being an example: Majnouna's Tutorials
From what I've seen these are perfectly clean but teach a lot, if there is something "questionable" let me know I'll take the link down.

My main tip is keep the figures fun and "friendly" that doesn't mean never draw a villain but make them look "human"!  Of course the imagination does stop at people or animals, once you get in to your own space Anatomy is up for grabs and making something/someone "anatomically" correct isn't needed at that point.

That's the End of Part One, Part Two will deal with my Character that I designed a bit and show you some of how I've applied these things to my own drawings. - Can be found here.

Useful Links:

Would You Like To Read More Blog Posts Similar To This One? Take A Look At The Official Blog Archive.
Would You Like To See My Drawings? Click here.

Have A Question?
Ask The Firefly!


{Digital Art} Furry Friends - Close Up Series

This is an old series of drawings I did back in late March early Apirl of this year (2013) I just figured I'd share!  These were all drawn in GIMP, the flowers in a few backgrounds are old traditional drawing overlayed in the background. My personal favorite is Angel.


Mei The Feather-tailed Rabbit
Bigger Version

Morris The Dalmatian:
Bigger Version


 Maiko the Corkscrew Mouse!
Bigger Version

Angel the Cat!
Bigger Version

Chip the Parakeet!
Bigger Version

Tilly Toucan! 
Bigger Version

Enjoy!

May God Bless You, Your Family, Friend; Along With The Health Of Yourself, Family, Friends, And All Who Know You. ~ Amen


~ Firefly


Useful Links:
Would You Like To See More Of My Drawings? Click here.
Would You Like To Read My Blog Posts? Take A Look At The Official Blog Archive.


Have A Question?
Ask The Firefly!


Tuesday, October 29, 2013

[Tip of the Week; Week 4: Play With Lighting!

[Tip of the Week: Play With Lighting!


I don't know about you, but I almost always, shade from the same direction; This isn't necessarily bad, but it's not particularly good either! I suggest try and shade in other directions than your default.

Example: You shade always from the left? Shade from the right, or from above!

I created a simple process when I challenged myself to this just recently!

My Process: 


1: Draw a similar object 3 times in a horizontal row; I say horizontal so you can compare and make the objects close to the same size. (Don't worry about perfection just make sure it's recognizable) 

2:  Make an arrow next to each object pointing in the direction you want to shade; this is to remind you which way you are going so as to not make unidentifiable shadow directions.

3: Pick your media ( I used colored pencils).

4: Mark off the shadows as outlines then color/shade how you normally would you default direction  only in a new direction.

5: Take your time! And don't be ashamed to use references if needed!


That's my tip for this week! I hope it was helpful.

Have fun!


May God Bless You, Your Family, Friend; Along With The Health Of Yourself, Family, Friends, And All Who Know You. ~ Amen


~ Firefly


Useful Links:

Would You Like To Read More Blog Posts Similar To This One? Take A Look At The Official Blog Archive.
Would You Like To See My Drawings? Click here.

Have A Question?
Ask The Firefly!


[Traditional Art] Some Practices!

I figured I'd post up some of my practices, maybe it'll help any of you in a mental block!

Lets Begin!

Pencil to sketch out the squares using a ruler, washable markers, colored pencils and crayola paints to play with different patterns and such! - 11X15 Watercolor paper (from Big Lots, so it's not expensive paper at all!)

Bigger Version


Crayola Watercolor tray-paint and white acrylic craft paint; I used a normal pencil to sketch before coloring and a ruler for the cube. - 11X15 Watercolor paper

Bigger Version


Pencil to sketch and Niji tubed watercolor paints. - 11X15 Watercolor paper:

Bigger Version

I had old pencils that are made for black and white drawing and drew a realism challenge!
Her hair is a bit flat, but other than that I'm pretty happy with it!

 Materials Used:
Bigger Version
  • 6B Drawing Pencil - Darker tones
  • Standard HB #No 2 Pencil (like what you use for home work!) - Mild Tones and Sketching
  • 0.07 mm Hard Lead Mechanical Pencil - Fine lines
  • Knead-able eraser, Add on eraser (what you put on the end of a pencil), a semi soft eraser. ( was aiming for different lighting with them)
  • Paper blender (it's like a white stick but it's made out of a paper type thing and you use it for blending)
  • White pen (but it didn't really end up all that visible. :S)


This here was a challenge I did for myself! Try and shade the same object in 3 different directions!
I sketched first and made arrows to show where I want to come from so I can keep my mind better focused! - The objects aren't perfectly similar but they're pretty close.

Bigger Version

Then I colored them!
Bigger Version

Pencils:
  • 10 Prismacolors
  • 8 Crayola
  • HB #No 2 pencil - Sketching

Other:
  • 3/0 paint brush
  • White craft acrylic paint
  • 12X18 Inch Sketch pad, slightly textured paper, 60lb
  • Colored Blender Pencil
A more detailed look at how to do this type of challenge yourself can be found here.

 I hope this was enjoyable to look at, and maybe it helped you get ideas on how to get out of artist's block!

May God Bless You, Your Family, Friend; Along With The Health Of Yourself, Family, Friends, And All Who Know You. ~ Amen


~ Firefly


Useful Links:
Would You Like To See More Of My Drawings? Click here.
Would You Like To Read My Blog Posts? Take A Look At The Official Blog Archive.


Have A Question?
Ask The Firefly!

Wednesday, October 23, 2013

[ Tip of the week; Week 3: Don't get frustrated!

Often I get frustrated because I can't seem to muster up any inspiration! Don't do that! It only delays it longer. - Instead do something else for now, if you feel spiritually tired refresh yourself, if you're mentally drained do what refreshes you (just don't hurt yourself in the process!!!).

So in 3 words: Don't, Get, Frustrated!!!

~ God Bless ~

~ Firefly

Wednesday, October 16, 2013

{Mixed - Digital Art] Drawing an Old Friend!

This is Renn Mei (yes spelled the same as my Rabbit like Character "Mei"), she also has an older sister Kohana, and a best friend Kano! I used to draw her and them a lot when I was younger (Going on 4 years now! >.<!!!). I've been thinking about drawing her again to see how my style has matured a bit but still keeping her original design intact!

The line art was drawn on paper and tweaked in GIMP, and I did all my coloring in GIMP.
 
Enjoy!

Renn Torso - 3-1/2 years old
Renn and Kano - about 4 years old!


So, here's Renn!
I suppose she grew up too. 
But her clothing style is exactly the same! If nothing matches it's fine, it's part of her personality to mix and match.

Line art - Bigger Version
Colored Bigger Version

New:


May God Bless You, Your Family, Friend; Along With The Health Of Yourself, Family, Friends, And All Who Know You. ~ Amen


~ Firefly


Useful Links:
Would You Like To See More Of My Drawings? Click here.
Would You Like To Read My Blog Posts? Take A Look At The Official Blog Archive.


Have A Question?
Ask The Firefly!


Tuesday, October 15, 2013

[ Tip of the week; Week 2: Design a Character!

If you want to get better at drawing, design a character, don't worry about perfection the first time! Just keep working at it, make a system for the order you draw things on that character, make a layout pointing out the distinguishable parts of the character! Name them! Make them your friend! Nothing better than a friend that you know the heart of, and you get the privilege to give them the heart yourself!

Have fun!

~ God Bless ~

~ Firefly

Update:

Since posting this, I wrote a 2 part blog post on this subject.

My Current Process in Designing a Character! - Part One

Wednesday, October 9, 2013

|- Sketches -| Cats and Face Angles

Just some sketches, it's such a pain to draw animals for me and also different face/head angles so I was playing with these last week!


Bigger Version


Bigger Version


May God Bless You, Your Family, Friends; Along With The Health Of Yourself, Family, Friends, And All Who Know You. ~ Amen


~ Firefly


Useful Links:
Would You Like To See More Of My Drawings? Click here.
Would You Like To Read My Blog Posts? Take A Look At The Official Blog Archive.


Have A Question?
Ask The Firefly!

All My Uploaded Time Lapse Videos So Far!

These are all my time lapse videos I have uploaded so far, I just figured I'd share with all yous!


May God Bless You, Your Family, Friend; Along With The Health Of Yourself, Family, Friends, And All Who Know You. ~ Amen


~ Firefly


Useful Links:
Would You Like To See More Of My Drawings? Click here.
Would You Like To Read My Blog Posts? Take A Look At The Official Blog Archive.


Have A Question?
Ask The Firefly!

[ Tip of the week; Week 1: Don't be scared!

I've been trying out new things with drawing lately, and I must just say, never be scared to try new things! I'd be good at these things by now if I hadn't avoided them for so long!

So my tip of the week, try new things! If you're scared to fail you've failed already.

Have fun in your endevours!


~ God Bless ~

~ Firefly


Wednesday, October 2, 2013

{Digital Art} Speak Life; TobyMac Portriat

This is my first portrait of a celebrity and my first art project being 18! wooo yay me!
Sketch One - Bigger Version
This is TobyMac, he's a Christian singer (pop hiphop stuff) more famous among us kids, hah!
Sketch 2 (Edit) - Bigger Version
But anyways I've only done one other portrait, it was of a lady's daughter and I didn't post to keep the confidence. I'm new to this kinda thing and coping people and photo references are my worst nightmare. I'm wasn't going for full realism or anything but I did want it to look like him!
I guess you'd say I wanted capture his essence. I was going to outline him in the end but I forgot so...oops! L0L


Anyways...Enjoy!


Bigger Version


Bigger Version

Programs used:


  • MyPaint
  • GIMP
  • HyperCam
  • Windows Movie Maker


Photo Reference


My video of this is going to be a little odd, I put the sketch in the wrong spot in the middle of the video, but it took so long to export that I didn't want to wait until tomorrow to upload it so I stuck with this version. - It also skips a lot of stuff, the laptop I use to draw on was getting laggy with MyPaint, GIMP, HyperCam and  Media player all at once so I turned HyperCam off.


May God Bless You, Your Family, Friend; Along With The Health Of Yourself, Family, Friends, And All Who Know You. ~ Amen


~ Firefly


Useful Links:
Would You Like To See More Of My Drawings? Click here.
Would You Like To Read My Blog Posts? Take A Look At The Official Blog Archive.

Tuesday, October 1, 2013

New Download: How to Paint an Eye (Iris) with MyPaint and GIMP - PDF

New Download: How to Paint an Eye (Iris) with MyPaint and GIMP - PDF

 
How to paint and eye (iris) using MyPaint and GIMP.
I think you could do all the steps in GIMP just ignore the special brushes and do it in GIMP purely. This is my style not a specific style like "Anime" or "Realism" I do this or variations of this with all my types of drawings. 
 
I was a bit distracted and I had to kinda "tape" this back together since the original document wasn't working right I had to paste this back together in a new document! So if something is confusing feel free to ask. 

I hope this is helpful for somebody!
 
Download Here
 
12 Pages with Step by Step Instructions, Full Color Pictures to help you see what you are learning.
Redistribution allowed if I'm given full credit. - MyPaint and GIMP are used to draw one iris not one eye for each program.

Enjoy!


May God Bless You, Your Family, Friend; Along With The Health Of Yourself, Family, Friends, And All Who Know You. ~ Amen


~ Firefly


Useful Links:

Would You Like To See All The Downloads I Have To Offer? Click Following Link For The Official Downloads Page
Would You Like To See My Drawings? Click here.

Have A Question?
Ask The Firefly!