Moko-Young's Factoid Firefly album on Photobucket

Tuesday, December 15, 2015

Tilly Is Two!

Just a quick speed paint for Tilly is two (game became 2 years old in November)!


Enjoy!

~ God Bless ~

~ Firefly

Animation Tips

In this blog post I'm going to write about some tips for animation. Please note however, that I am still a novice myself but these things seem to work for me. Well lets get started!


Note: I think I should note before I go anywhere with this that I am talking about small one object animations done in a graphic program like GIMP or Photoshop (among others) that might end up as a .gif or a sprite; Though you could apply this on a bigger scale with individual elements in a scene I am not referring to scenes as if you were going to make a movie. I have never made a scene (yet!) so I will not talk on things I do not know enough or anything about.


Sketching Out Your Idea:


The first thing I'd say before you animate anything is, you need an idea of what you want and what it will look like (generally). This comes from sketching out your idea frame by frame, preferably ( at least how I do it) side by side on one piece of paper, sorta like a story board...I do this and make notes about what I want in sketch book for reference. This helps me know what I'm aiming towards, will you use all the frames? Maybe not. Will you need more frames? Maybe so, but at least you could point yourself in the right direction.


Animate Separately (When Possible):


If at all possible, animate your animated bits separately from the full object (picture). For example, for all my sprites I used to make the player object in Tilly's Rose Garden Spring I drew the eyes separate from the face and made a layer from visible for the frame. I did this because animating the eyes prevented small little errors in her face (twitching animation from trying to draw on top of a finished drawing, wiggling animation, inconsistent image). In the game itself I put Tilly as a background image and just made a sprite for her eyes and it made her look alive within the main menu. This is just one example there are other things as well you can animate separate like the mouth or tears just to name two. A lot of the time this might not be possible but if you have only on area moving the the basic object never does, try only animating the part that moves after your base image is complete, for me this works better since I don't draw every frame, I draw one frame then edit it to what I want after.


Observe/ Find Out What You Are Animating Looks Like For Real:


Copyright To Disney
Some things are easy to know what they look like out of memory (like an eye blink) others are harder like a walk cycle or a ball bounce. Granted the latter two you can find tutorials on but some things you just need to find out on your own. A personal example would be my caterpillar/worm animation, I was given advice by my mother who studies bugs and insects and all that stuff on what that “cycle” would look like, she even drew it for me. Now true most people don't have a bug lover around but the point is that you get the information wherever you can. You want to animate a bird flying? Watch them see what they do, make sure you don't mix species (unless it's on purpose to make a mutant for a character design) look at stills, find tutorials whatever helps you get a better comprehension of your subject.

Some things you just have to draw and figure out on your own, a good example of this is Lumiere the candle stick from beauty and the beast, they made a candle stick dance like Gene Kelly, that's not a simple feat to do! But the point is they have to figure it out, they couldn't watch a candle stick dance.


Make A Draft Before Doing Final Animation:


Before you start thinking I just said that in the first tip, what I'm saying here is not the same thing as sketching out your animation on paper as a reference. What I'm talking about here is before you finalize your animation as either a “line-art” animation or a full color animation sketch out each frame first and test it out to see if it's smooth or jumps if the size is consistent of your object(s) you are animating. In my own animations I use the preview feature in GIMP it's fast going (though you can adjust the speed slightly) but you can see enough to know whether this animation will be good or not. It doesn't matter how pretty the colors are, if it's not smooth it's not going to look as good, so make sure it's smooth before you color it and in my opinion do not draw one frame at a time in full then go to the next.


Don't Be Afraid To Reuse Frames:


In some cases drawing another frame is pointless since a cycle can be done using only couple drawn frames. The best example I know of at this point and time is an eye blink, you only need to draw 3 frames for it to be believable, you could do more if you want it super smooth but for things like sprites the less frames the better so you don't make your game so big...Anyway back on topic here. For an eye you have frame one which is the opened eye, frame two the eye half closed and frame three it's closed. Not get the second frame, duplicate it and put it after the 3rd now your eye closes and opens.


____


I hope this was useful for somebody.


God Bless,


~ Firefly

New Animation For Tilly's Rose Garden

You might remember  This Animation I did last year for Tilly's Rose Garden, everything is in frames and done in movie maker. Well I've made another one only I made it in game maker with timelines, now there's no extra video to upload with the game! I'm rather happy how it turned out. Here's the animation in a video. I had to re add sounds in movie maker because I can't' record off my sound card.


Enjoy!


~ God Bless ~


~ Firefly

Wednesday, November 18, 2015

9 Ways to Make Game Creation Easier

So you wanna make a game? That's great! I don't claim to be a pro at it myself (far from it to be honest!) but I have picked up some things that are very helpful in getting better and staying organized. In this post I will talk about some of these things and hopefully give you an idea of how to at least start a foundation for your game making journey!


(1) Create A Foundational Idea


This might seem obvious but believe me there is a difference between winging everything and having a basic idea of what you want. You might not know what every detail is but at least a basic idea is good to get you started. For example, is it a drag and drop game? Or is it a RPG? FPS or Puzzle....Or maybe a combination of a few types? You need to know the theme. Characters, graphic style and ins and outs of every feature are really honestly afterthoughts.

Know your foundation then work on top of it, if you don't know what the foundation is, you'll keep changing it and have to remake things multiple times.


This does not mean however that you have to cage yourself, sometimes a foundational change is needed, the point of a foundation in a game creation process is to help you get started and be focused.
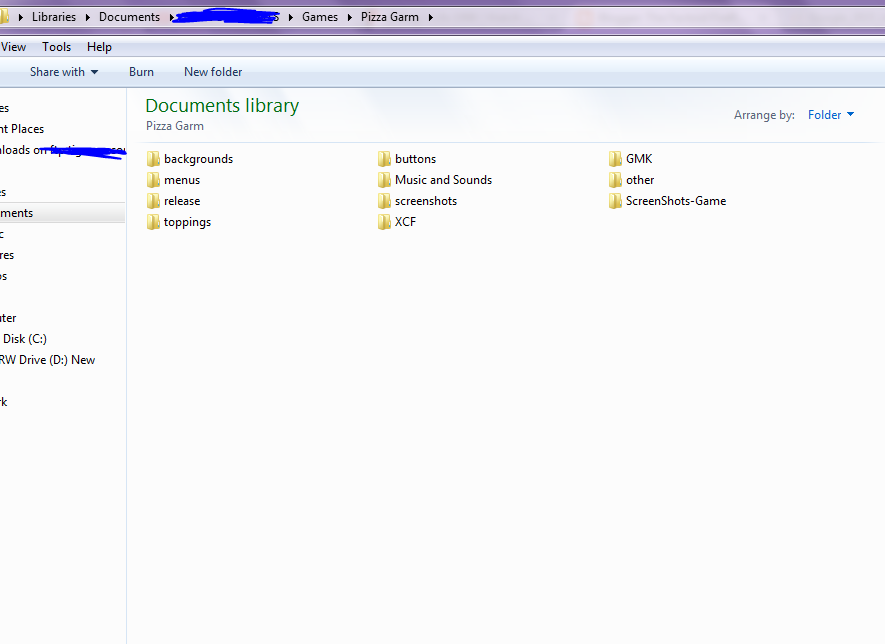


Object Folders

(2) ALWAYS Stay Organized


I know for a lot of people this is a dreaded thought but trust me it's worth the effort.
Sprite Folders
If you are making a game with sprites, keep them all in folders and organized in a way you can remember. How I organize it by points, enemies, power-ups, beautification (eye candy objects/images/sprites). Also if your game creation program has a folder capability USE IT! It's so much easier trying to create levels when you can find all your elements to your level easily.


Another way to stay organized in level creation is making any invisible objects (if your game creation program allows it) have a sprite with 2 frames, 1 with a label to say what the object is so you can see as you're creating the level, and one that you can set the object to use which is invisible (no image just a transparent frame) so you don't see it in game. This helps you know if you added music, the scoreboard and/or anything else you might have added.


Folders For Images, Projects Files, Sounds Etc..

(3) Make a List of Your Variables With a Note of What They're For.


Listing Off Variables
If you start learning programming in a game you will end up with commands and variables, once you start to really learn you will end up with a lot of names that you create for different things, even if you have a good memory you might still forget some of what these variables and commands do, so it might be a good idea to make a list what they do. I don't mean the entire code just a simple note of what it's for, you'll remember the rest. I'm just starting this habit. I'm making a script file with notes in it so I know what everything is but you could do it in any number of ways whether it be a notepad++ document, a word document or a list in a notebook I think this is a good idea.


(4) Lists Are Your Friends


If you know a lot of what needs to be done in your game, make a list of it and mark off what you get done, this helps when you are really stressed out. Write every little thing you want to do, so if you do 10 small things that might seem meaningless overall you can make it off and your list gets smaller. This has helped me so much in game creation.


(5) Draw Out Things In Your Game and Work Out Problems On Paper.


Points System Created On Paper For Blox
I don't just mean using algebra to figure out the (x, y) axis of where a certain instance needs to spawn I mean everything! I've created point systems, worked out what entire sections of what a game has to do and it was all on paper. I feel freer in a sketch book, but you might prefer note book paper or even MS paint. However your thinking process is turned on use that to help yourself work things out. And don't be afraid to draw pictures, doodles, symbols, everything you do will contribute to a better made more thought out game. I use childrens' markers, a sketch book and a pencil to do some of my most critical thinking and it makes for a great result (even with my noob knowledge in programming).


(6) Don't Be Afraid To Use Google and/or Ask People You Know Have More Knowledge Than You.


I've been blessed with having a good friend who also mentors me when I need it in game creation. I know some people might not be as fortunate to have a person to be one on one with, but you can still Google, find forums and read the game creation program FAQ. It's okay to not know and it's even better to go out and find out. Some things I learned to did just by digging in Google long enough.


 Not everything you want to know is there but read things anyway, some of the features I learned was from me looking up something totally unrelated to my problem because my actual problem was never addressed online anywhere. Also if you do find somebody to help you, take their advice and don't cringe too hard when they tare up your game and put it back together the right way.


(7) Save Back-Ups of Your Project Files


Whenever you start a project it's good to back up everything, and as you go along save a new project file so you can never totally loose everything in case for whatever reason that file becomes corrupt. This is actually a second hand tip, my mentor always says to do this, and he's always right so...do what he says!


(8) Don't Stress Over the Game Name


When I was creating Blox I was stressing over what to name it because I had no clue, and really it took a little bit of the fun away cause I was so upset I never named the game. Don't do that! Work out your game, enjoy creating and once you have it's “personalty” worked out then worry about naming it. I didn't name Blox until it was almost entirely complete. Keep this in mind as you create your game, and until you publish your game in some way the name isn't set in stone, you can always change it later.


Do keep in mind if you gain a following people might not like you changing it after calling it the same things for a few months, sometimes the real intrigue is in the game name not really what it does. Not to contradict what I just said about don't worry about the name, but it's just something to keep in mind.


(9) Have fun

Remember, you are learning (Even if you are advanced you are always ever learning), if you aren't in a company you don't have any reason to be so serious you loose the joy of creating and exploring. It's creating a game, and after all we all know that games are really for the child in us all...Even if some games wouldn't ever be called child's play. Enjoy your games, make them so fun that you want to play them yourself, trust me it'll help, you're going to be your main beta tester and you don't want to be sick of your own game!


So to refresh and sum up, have a foundation, stay organized which could include keeping a log of what your variables do, draw things out to work out problems, never be afraid to ask for help and seek information you need, back up your stuff and most of all...HAVE FUN!


I hope this has been helpful for somebody.


~ God Bless ~
~ Firefly

Wednesday, November 4, 2015

New Stuff For TRG!

Alright ladies and gents I'm getting back in to my game creation stuff!  Tilly's Rose Garden Spring will be worked on more often now!

I've actually started up already, I've updated some stuff and I'm adding things.

1. I've changed the tulip point images/sprites and added another color

2. I've created a points system - I'll make a "how I created" my point system later. I will say that I did the same thing as my blox point system as in I used my sketch book..But yeah whole process will be written up later.

Here's an excerpt though:

//point system rules:

    // Each point group goes up by a consecutive number-group.
                             //(ex: rose go by 10's)
....... 


//Point Worth Consecutives:

    // Roses: 10's
    // Tulips: 1's
    // Lillies: 3's
    // Daffodils: 15's
    // Hearts : 5's (starting at 50)  [Bonus winged heart not included consecutively] 

3. I'm working on writing up my "rules" for how things work in the framework of the game. It won't be relevant to anybody but me, but I might make a PDF for people to read to help them get an idea on making a framework/foundation for their games.


4. New points, power-ups, and enemies:

Mushroom bonus point, winged heart bonus point, (tulip image redone) new yellow tulip point, and a new daffodil point. - New Point Drainer and a new Point Transformer.

I will also be adding health drainers, and a mega drainer which will drain health as well as points, also a (hopefully animated) snail that each time you're touched by him you slow down...more ideas as well but you can't get everything in one sitting! You Must Wait! Yes I am mean today.


Lastly for now is I'm adding a health system...It's sketchy still but it's coming along.


Okay so there's some updates! I'll be updating you more though not as often like I used to, I have no internet so I have to go out to get it. I'll be slow posting but I'll be working!


~ God Bless ~


~ Firefly

Friday, September 11, 2015

Inking Tips: Solid Vs Loose Lines

In this post we're going to talk a little about inking. I've spent a little more time with pens and ink so in my tests and drawings I've learned a few things that I'd like to share. I will sperate this in to two sections: Solid vs Loose Lines and Texture/Shading. This isn't extensive but I hope it's helpful in the long run!

Note: When I say inking, I mean art pens, not a brush or fountain pens, though these things might apply to those as well. I am talking about art pens like Prismacolor pens or Sakura Micron (or pigma) pens (or other pens like them, there are other brands as well).


So, without any further ado, lets begin!


Solid Vs Loose Lines: 


I've learned in recent months and really over the year that just because something is outlined that doesn't mean that the lines themselves have to be totally hard in nature. For example, if I drew a cartoon cat face I could ink with hard lines and you can tell he's fuzzy, or I could ink with looser more fluid lines not following the exact curvature of the face and he could almost appear to feel furry. He's still a cartoon but he's got more detail.

Neither one is better than the other but they are different. However if you like to color with a looser medium like watercolor, or a more detail oriented medium like colored pencils (pencil crayons in some countries) then maybe the looser style is more fitting. Of course it depends on the subject matter.

In the drawing below the inking on the character is loose and the inking on the poppy flower is solid. Knowing when to combined styles is key to making a picture coherent and not just a rambled mess.  Another thing to notice in this drawing is that there are different line thicknesses. The pattern on the dress has thing lines the fur on the character is thicker as well as the outline of the flower itself. It's all about finding what looks good.


Combining styles, knowing when, and creating something nice comes with practice and also some knowlage of yourself. Your style might be different than mine, so as I say these things it's not THE WAY it's just how I see things, take what's useful and ignore what's not....Anyways, moving on!

Texture and Shading:

There are many ways to add texture and shading while using pen, it can be VERY time consuming but it is well worth the effort.

 Within the styles there are many things you can do, a few are:  Hatching, cross-hatching, circles, scribbles, lines, and dots. Each of these have their place and are great for texture and shading, as well as fun patterns if you like artwork that isn't a subject oriented but an abstract style.

As a few examples I drew grapes, a tulip and an eye to show some of the things you can do with ink.


Grapes:


With the grapes I added a lot of black areas, these show contrast, three-dimensionality , and also some shading. I also did cross hatching on the grapes and the leafy part as well as scribbles on the grapes that would be more shaded. The section that says highlights refers  to those little parts I "roped off" that show where light would be hitting the subject.


Tulip:

For the tulip, I also did some contrast with the highlights and cross-hatching, but I also added some lines along the edge of the flower following the curvature, it's a more subtle looking approach to shading lovely for "softer" shadows.  I also added cross hatching in the more shaded areas.


Eye:

The eye shows fluidity with the eye-lashes, making fast but calculated strokes can make your artwork look much more "alive". I also used lines to the hair of the eyebrows, also using fast movement to make the hair look more fluid and textured. Highlights as  well on the white of the eye (since it's really off white and moist you would have a highlight sometimes) and the iris itself.


Another thing you can do with ink is make areas black (or dark if you're using a colored pen) then go over it in white. In this picture I colored the edge of the butterfly-wings black then went over them with a white pen. - You will also notice that I used different pen sizes as well as did lots of contrast black. Also if you look at the picture you'll see I added dots which add texture and a pattern to the butterfly.


In this drawing you can see I used hatching to texture the sash, circles in the paisleys and scribbles to show the shadow of the neck. There's also some contrast shading too.


Overall these are some things I've learned and I hope they help you as well!
Thank you for reading and God bless.


~ Firefly

Character Design - Bunny Character

During this Hiatus I have come up with a bunny character! I'm not sure what I'm gonna do with it but at least I have it for maybe a new game, or a story...not sure. These images were taken with a cellphone camera so they're gonna be kinda LQ.

So I haven't named her yet, I don't know what to name her to be honest...it might come eventually.

This is the first drawing, it's ink and watercolor along with some soft pastels.
I like this style personally.


These 2 drawings(on one page) are drawn with Prismacolor pens, then base-colored with Sharpies and Bic Markers (which are alcohol based) and shaded with colored pencils blended with a colorless blender pencil.


I hope you enjoy her!


~ God Bless ~

~ Firefly

Ink and Wash Drawings

Okay so...I'm not posting much, I know that's bad...But I am busy! I'm sorry! D:

I have done some art-works though. So here are some.


2 Ink drawings - Both use an ultra-fine sharpie and 03 and 01 sakura micron pen.


These have the same pens, the pumpkin and heart drawings  I used a 1.0 pigma-sensi for the super thick outlines.


Enjoy!


~ God Bless ~


~ Firefly

Saturday, August 8, 2015

Few Ink Drawings - 8/2015

I've been occupied a lot lately but I have done these ink drawings.

I used random inking pens for them mainly pigma micron and a fine point sharpie, but a few others too, also a white pen. Sketched with a pencil and used a kneadable eraser.


May God Bless Everyone You Know And Love. ~ Amen


~Firefly

Thursday, July 16, 2015

A little animation action going on!

Wells, I've been working on Tilly's Rose Garden a bit, and I have animated some stuff.

Here's the new sprite for the player (this is a long gif but it shows it better than a video, even with quality losses). - [I'm moving the object in a practice room]


And I just animated this little Caterpillar!


Enjoy!


~ God Bless ~


~ Firefly

Wednesday, July 1, 2015

{Resource} How To Paint Hair in GIMP 2.6 and 2.8 [PDF]

Hi there! I made a new resource after a VERY long time for this blog....actually I was making it for a friend but figured why not post it here too, but yah...details details!

Okay as the title implies this is a PDF on digitally painting hair in GIMP. I chose to do both 2.6 and 2.8 since the friend uses 2.6 (and it's better for this imo) and 2.8 is the version being used majorly right now so it only made sense really. I hope you learn and enjoy my tutorial!


View Online
Download


~ God Bless ~


~ Firefly

Sunday, June 28, 2015

{Game Release} Blox, Official Demo

It's finally here, the demo you've all been waiting for! With 5 levels, 60 fps mobility, and colorful 2D graphics. Introducing....


Bugs:

1.  Sometimes the ball gets stuck going in a certain direction and you can't stop it. This can happen going from the bar to the wall or between walls/blocks. If from the wall to the bar is the case just let the ball die or try to manipulate it (it is possible almost every time). If it gets really bad you can reset the ball by pressing “Enter”, this will act as if you died only you don't lose a life but you do lose the 100 points.


Programs and Tools Used:


  • GameMaker 8.0, 8.1 - Putting the game together, minor graphics
  • GIMP - All major graphics, images for the manual
  • Sony Acid (Free Version) - Sounds
  • Goldwave - Volume adjustment, sound editing/mixing, format conversion.
  • Word Pad - To make a check list
  • Opened Office Writer /Opened Office Draw - Making the Manual
  • Calculator - Coordinates, any math needed
  • Sketch Book - Concept work
  • Markers - Concept Work
  • Internet -  References/ Tutorials.
  • Snipper Tool - Graphic help, screen-shots
  • Mp3 Compressor - Compress music size


Special Thanks:
  1. W.Card - Bug Fixes, advice, overall help.
  2. K. McKlutz - Grammar Checking
  3. Eric Skiff - Music


______

Comments welcomed!
____

I hope you enjoy my game!


~ God Bless ~


~ Firefly

Wednesday, June 24, 2015

Blox Demo Release Date

Well, haven't said much here but my game blox has a demo! I will be releasing it this Sunday, the 28th, of 2015. I hope you all enjoy it, see you then!


bloxdemo


~ God Bless ~


~Firefly

Wednesday, June 17, 2015

Few drawings...again!

I haven't had a whole lot of inspiration, and also been working on my game so it's been hard to really draw and do that but I have gotten a few little things drawn so....here it goes....Enjoy!

This is ink and watercolor pencils along with normal watercolor, it's on 90lb mixed media paper and there was no previous sketch....the real practice here was to draw something without a sketch. - This actually took like 2 or 3 hours..something like that.


This  drawing is  done in soft pastel and prismacolor colored pencils. I also used erasers a lot to erase smudging and making highlights and stuff; this did have a previous sketch. I'm pretty happy how it turned out. This is also on my mixed media paper. I used cotton swabs, and a colorless blender pencil to blend, and of course nothing like old fashioned finger blending.


This here was done on watercolor paper. I did a small thumbnail sketch first so I'd know what I'm doing...or at least a basic idea. I haven't drawn a character in a long time so it was actually a little difficult to do. I sketched with a normal pencil, inked with an ultra fine point sharpie and a 01 Sakura Pigma, after coloring I went over lines with the fine point sharpie and a thicker point sharpie. I colored using Fine Touch watercolor pencils and Niji watercolor paints. I also used two Faber-Castell watercolor pencils. - And a white pen for highlights.


May God Bless You, Your Family, Friend; Along With The Health Of Yourself, Family, Friends, And All Who Know You. ~ Amen


~ Firefly
Useful Links:
Would You Like To See More Of My Drawings? Click here.
Would You Like To Read My Blog Posts? Take A Look At The Official Blog Archive.
Have A Question?
Ask The Firefly!


Tuesday, June 2, 2015

Few Tutorials and Challenges!

Over the last week I followed a few tutorials and did a few "challenges".
I hope somebody likes them!
Enjoy!


1. The Lighting Challenge


I have done this challenge before a few years ago, and described my process but this time was a little different. This time I also used a different media for each angle.


2. Following Tutorials By Mark Crilley.


I first followed his current (as of May 30th) tutorial on How to Draw Baymax From Big Hero 6 (Must see that movie else you're not living life right!). After that one I followed How to Draw a Mouth/Lips Front View. Lastly I followed How to Draw a Mouth/Lips 3/4th View. I showed him (via internet of course!) and he said they were beautiful! I feel cool enough to do this.


I used 2 different HB #2 pencils (one was cheaper so it was more scratchy and made darker marks), a black prismacolor (must stay true to Crilley tradition!), cotton swabs for blending, kneadable eraser for normal erasing as well as highlights, and I broke my own tradition of NEVER using a ruler (because I in all honesty hate them) and followed the tutorial even down to using one. Which it worked out good but I still hate rulers.....I'll get over that....Eventually...Yeah..

I also hardly ever use grayscale, I do ink drawings but that's black and white. So since I don't do any of these things I'm pretty proud of my results!


3. "Right Hand Challenge" (For me it's the Left Hand Challenge!)


The challenge is originally called right hand challenge because most people are right-handed but because I am in the same category as Einstein I am left handed. ( I kid about being Einstein but he was left handed)

The point of this challenge is you draw a picture with your "favorite hand" and then try and draw it again with your "dumb hand" (the one you don't use as much). I drew something I know good, a sunflower. This actually got me feeling physically sick going against my body's natural rhythm. But I managed to finish it! - I think considering I'm not ambidextrous at all this came out pretty well.


Just a normal pencil.


______

 
May God Bless You, Your Family, Friend; Along With The Health Of Yourself, Family, Friends, And All Who Know You. ~ Amen


~ Firefly


Useful Links:
Would You Like To See More Of My Drawings? Click here.
Would You Like To Read My Blog Posts? Take A Look At The Official Blog Archive.


Have A Question?
Ask The Firefly!