Moko-Young's Factoid Firefly album on Photobucket
Showing posts with label Factoids. Show all posts

Saturday, March 21, 2015

Tip of the Week: Add Fluidity

Adding Fluidity
Stiff -vs- "Fluid (Curved)


A drawing needs fluidity, balance, and some freedom. Even in hyper realism there is much fluidity.
If you are drawing a face or a body, you have contours of the muscles and fat of a body...


...Or if you draw an animal, the fur doesn't simply stick out, it flows and follows the shape of the animal.
Animal Fur (cat ear)


 Plants don't grow stiffly up in most cases, they have weight, bends and flows, they move and twist in the wind and though it might sound weird they actually do breath...I suppose what I'm trying to say it that living things aren't stiff, they move, they bend, and the show presence, if you want a good drawing you need to present that in some way.
See how the vine flows?


Same thing with textures like fabric, even sitting there it has depth when something moves past it it flows, when the wind touches it there is a light-weight feeling to it. Take this drawing for example:


One thing to avoid, though, when trying to make things interesting is to not make things seem “plastic”, if you have something at on angle, having a smaller similar object going at the same direction can make it unbalanced like you are trying too hard.


I hope this was helpful!


May God Bless You, Your Family, Friend; Along With The Health Of Yourself, Family, Friends, And All Who Know You. ~ Amen


~ Firefly
Useful Links:
Would You Like To Read More Blog Posts Similar To This One? Take A Look At The Official Blog Archive.
Would You Like To See My Drawings? Click here.
Have A Question?
Ask The Firefly!

Monday, January 26, 2015

{ Game Release } Flufffertini's Pizza Constructor

This has been my secret project for the past week or so! Took a lot of work and brain-draining but I finally got it! This is my first Drag and Drop game ever! Comments are welcomed.

Also note that I am a windows user and don't know how this will work in non-windows OS systems.


_____

 Introducing....


Download


Note:
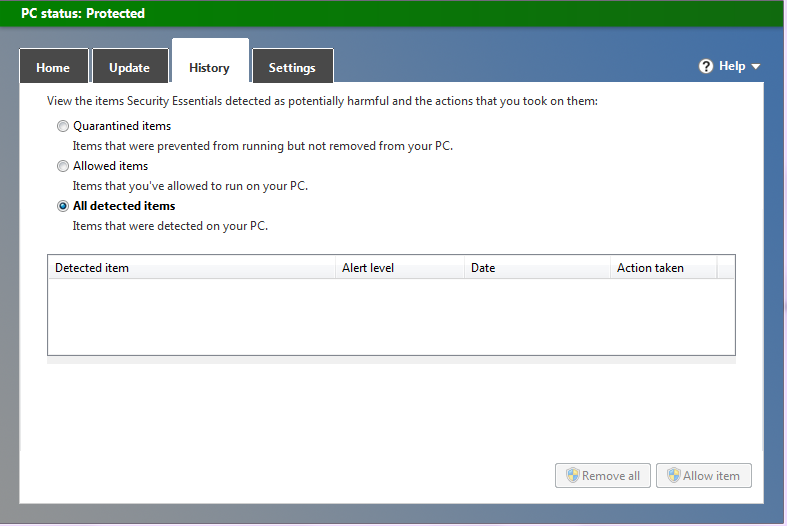
Due to my host being a private domain (borrowed space) you might get a notice saying this is a virus. This is because the server isn't a "known" source to downloads therefore considered unsafe. I have this screenshot showing I scanned it saying it's safe!


© 1/2015 - All Rights Reserved, The Factoid Firefly [Game]
© All Rights Reserved, Jason Shaw, Audionautix [Music]


Programs Used:


  • GIMP – Graphics
  • Goldwave – Conversion of Music to a .wav file.
  • Sony Acid – Sounds
  • Gamemaker – Game Construction; Image Editing
  • Calculator – Coordinates


Creator's Notes:

Features:


  • Drag and Drop Capability
  • 3 Bases to Choose From
  • 21 Topping Selection + Index
  • Delete-able Toppings Once Put On The Pizza Base.
  • Easy to Navigate Menus


Annoyances/Bugs:


  • Sometimes if you move the mouse as you are releasing the left mouse-button (dropping an object) the object does not fall but still follows the mouse. This can be remedied by clicking again. - This is more likely if you are using a touch-pad but it also happens with a normal mouse.


  • Not often, but sometimes a topping starts glowing after you drop it. This has only happened a few times while I was developing so it shouldn't cause you any trouble and it's not harmful you can just delete the dropped topping using right click.


  • If an object is too close to another (that has been dropped) and you go to move them again, they might overlap. Once overlapped you cannot pull them apart because though the image looks like a certain shape it's really on a square that is almost identical in size for a background; Because of this, if you click on one object it sees both as one. Just delete them and start over if you don't like how it looks. - This principle applies also to deleting.

  • Though images look on top of each-other when you are dragging and object they will always go on top. I don't think there is a way to prevent this.


  • For some reason the images look under the dropped images but when dropped it goes on top.


_____


May God Bless You, Your Family, Friend; Along With The Health Of Yourself, Family, Friends, And All Who Know You. ~ Amen


~ Firefly
Useful Links:
Would You Like To See More Of My Drawings? Click here.
Would You Like To Read My Blog Posts? Take A Look At The Official Blog Archive.
Have A Question?
Ask The Firefly!

Thursday, October 31, 2013

Special Shout-Out To: We Draw Animals

Upon being given special permission I'm going to both give a shout-out and put in my "Programs and People I Recommend" side bar this website!


http://www.wedrawanimals.com/


"We Draw Animals" has at this moment around 200 hundred tutorials on drawing different animals, it goes from the level to a young child around the age of 4 up to the average person who wants to learn how to draw animal figures. It ranges quite far touching on fish, insects, mammals, and more! - The website also provides some "Fun Facts" about the animal you're about to draw to add some extra fun and flare!

I hope you enjoy and learn from the site as much I do!

Link can be quickly found in the side bar of the blog.

We Draw Animals Facebook
We Draw Animals Official Web Site


~ God Bless ~

~ Firefly

Tuesday, October 29, 2013

[Tip of the Week; Week 4: Play With Lighting!

[Tip of the Week: Play With Lighting!


I don't know about you, but I almost always, shade from the same direction; This isn't necessarily bad, but it's not particularly good either! I suggest try and shade in other directions than your default.

Example: You shade always from the left? Shade from the right, or from above!

I created a simple process when I challenged myself to this just recently!

My Process: 


1: Draw a similar object 3 times in a horizontal row; I say horizontal so you can compare and make the objects close to the same size. (Don't worry about perfection just make sure it's recognizable) 

2:  Make an arrow next to each object pointing in the direction you want to shade; this is to remind you which way you are going so as to not make unidentifiable shadow directions.

3: Pick your media ( I used colored pencils).

4: Mark off the shadows as outlines then color/shade how you normally would you default direction  only in a new direction.

5: Take your time! And don't be ashamed to use references if needed!


That's my tip for this week! I hope it was helpful.

Have fun!


May God Bless You, Your Family, Friend; Along With The Health Of Yourself, Family, Friends, And All Who Know You. ~ Amen


~ Firefly


Useful Links:

Would You Like To Read More Blog Posts Similar To This One? Take A Look At The Official Blog Archive.
Would You Like To See My Drawings? Click here.

Have A Question?
Ask The Firefly!


Tuesday, October 1, 2013

New Download: How to Paint an Eye (Iris) with MyPaint and GIMP - PDF

New Download: How to Paint an Eye (Iris) with MyPaint and GIMP - PDF

 
How to paint and eye (iris) using MyPaint and GIMP.
I think you could do all the steps in GIMP just ignore the special brushes and do it in GIMP purely. This is my style not a specific style like "Anime" or "Realism" I do this or variations of this with all my types of drawings. 
 
I was a bit distracted and I had to kinda "tape" this back together since the original document wasn't working right I had to paste this back together in a new document! So if something is confusing feel free to ask. 

I hope this is helpful for somebody!
 
Download Here
 
12 Pages with Step by Step Instructions, Full Color Pictures to help you see what you are learning.
Redistribution allowed if I'm given full credit. - MyPaint and GIMP are used to draw one iris not one eye for each program.

Enjoy!


May God Bless You, Your Family, Friend; Along With The Health Of Yourself, Family, Friends, And All Who Know You. ~ Amen


~ Firefly


Useful Links:

Would You Like To See All The Downloads I Have To Offer? Click Following Link For The Official Downloads Page
Would You Like To See My Drawings? Click here.

Have A Question?
Ask The Firefly!


Wednesday, July 24, 2013

MyPaint Brush Usage Demonstrations - Video 3:

 MyPaint Brush Usage Demonstrations - Video 3:

This is Video 3 of my currently ongoing series of videos based on the brushes in MyPaint, for better understanding of how they work. - In case you haven't seen the first video I recommend you go here to see it and the first post. 

The Brushes I will cover in this video are:
  • Water Brush One
  • Water Brush Two
  • Water Brush Three
  • Sponge Brush – Blending
  • Finger Blend Brush

Excerpt from the first post:

Each section will be a mini Speed-Paint (Time-Lapse-Video), the finished drawing will show the icon for the brush I used and before beginning a drawing there will be a circles around the brush as seen in the brush menu. - All brushes in this video are from the “Set #2” in the brush menu. -

Note: The Drawings will not be particularly awesome, it's just to get the point across. - No Audio. 


My Review/Overview for MyPaint can be found here.
MyPaint itself can be found here.


Previous Videos:

Video One
Video Two
Video Four
Video Five  
Video Six


I hope this video and the series thus far has helped you in getting started with MyPaint.
 
Enjoy!

May God bless you, your family, friends; along with the health of yourself, family, and all who know you. ~ Amen


~ Firefly


Useful Links:

Would You Like To Read More Blog Posts Similar To This One? Take A Look At The Official Blog Archive.
Would You Like To See My Drawings? Click here.

Have A Question?
Ask The Firefly!