Moko-Young's Factoid Firefly album on Photobucket
Showing posts with label Sketching. Show all posts

Wednesday, January 6, 2016

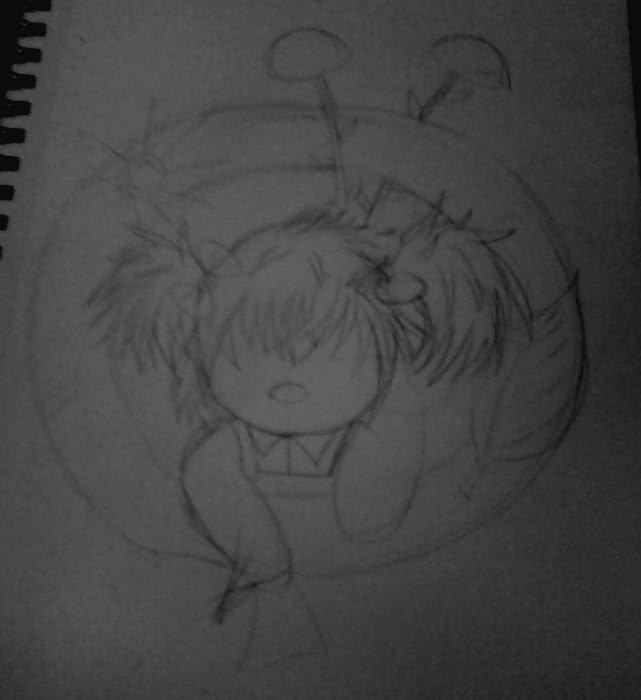
[Traditional Art] Fluffy Mei - Colored Pencil Drawing - First Drawing of 2016!!

Haiiiiiiiiiiiiiiiiii! Yes yes I hardly post art anymore...I know...I'm sorry! It's just a pain in the neck. There are many drawings I haven't posted, I might make a video or something for 2015 to make up for it...But anyway back to what I've done now!
Process Pictures

Some might remember Mei the feather-tailed-rabbit...An invention of my childhood don't judge me! Lol
Well anyway, she's getting a revisit....And a make-over of sorts. This is a colored pencil drawing of her if she was actually furry now just a chibi character...I hope you enjoy!


Time Taken: Approx - 7-9 hours


Media:


  • 36 - Prismacolor Colored Pencils
  • 10 - EK Memory Pencils
  • 8 - Crayola Colored Pencils


  • 6 - Other (random/ off brands)
  • Kneadable eraser - lighting lines, erasing
  • Normal Pencil - Sketching
  • Canson Mixed Media Paper
  • Sharpener


May God Bless And Keep In Good Health Yourself And All You Know And Love ~ Amen


~ Firefly


Useful Links:
Would You Like To See More Of My Drawings? Click here.
Would You Like To Read My Blog Posts? Take A Look At The Official Blog Archive.


Have A Question?
Ask The Firefly!

Monday, May 4, 2015

The Usefulness of Sketchbooks

Sketchbooks, something that I've always wanted but I never had the money to have. Whatever supplies I have (which is a fair amount) they're either old or other people bought them for me or just gave them to me. But recently I was able to buy a sketchbook and wow! I love it, it's like my friend and I hope I can have another one when I finish filling this one up with my practices and ideas and stuffs. In this blog I'd like to talk about some uses for sketchbooks.


First to say what kind of sketchbook I have, which is a Strathmore sketch book, the paper is 50lb (74 g/m²) and 9in x 12in (22.9cm x 30.5cm), it contains 100 sheets. It's good for pastels (the kind I have) ink if you don't press hard on the paper or layer it too much, and colored pencil, as well as normal pencils...okay on to “how to use” a sketchbook, or better some of the uses of one.


1: Freedom


The thing about a sketchbook is that you don't have to finish anything, it doesn't have to be good drawings, you don't even have to draw if you don't want to. It's like a diary of sorts you put your emotions and ideas in to it and make beautiful things without needing the judgement of “but it's not finished” or “it looks terrible!”. You don't need to do any of that, it's just fun!


2: Practice


Pastel and colored pencil practices
I don't know about you, but for me as stated in the opening, I don't have money to buy paper all the time so if I buy good paper I don't want to “waste it” by not finishing drawings; But with this sketching book I can doodle and plan out drawings with ease, no “guilt”, no feeling bad, that's its purpose, to be used for the less of par to make the good drawings great with better planing. And following tutorials, making terrible drawings in the process doesn't feel like I wasted anything. I can feel the accomplishment of finishing a tutorial without being like 'goodness me this looks terrible I wasted a page for nothing!” Also you can practice new mediums which is daunting if you're using good paper but in a sketchbook you can just have fun!


3: Pre-planing


I used this to draft my points system in a game I'm working on.
If you have a sketchbook you can pre-plan your drawings, doodle, work out kinks and bugs. It's a good tool for composition and story-boarding also. As well as writing notes, doing ideas for things like books and games. I personally use my sketchbook to plan out games, writing code that I think up or drag and drop options, as well as splash-screen design and menus. And many other things. Even if you don't stick to the original idea you can still use the pre-planing to help you do your final result on your project.


4: Doodling


This is a doodle.
I know that sounds like a childish thing to do, but doodling can actually teach you a lot. I've learned a lot about pastels by doodling with them, drawing without a sketch and just going alone made some nice results. I've also done things with just a pen, doodling that way is quite lovely and fun. You come up with ideas that way too!
This is a doodle too.


______________


Now that you've heard some good things about sketchbooks I'm going to talk about a few random things in closing.

Types of sketchbooks:
There are countless types of sketchbooks, some are in flimsy paper like the one I use, some that are almost like watercolor paper and everything in between. The size as well ranges from pocket sized to coffee table sized. You are not limited in any way to be free in what you want to do. You just have to be able to buy it, and for most that isn't a problem.


When to use one:
I  encourage those who are really in to committing to sketching as a good way to learn, to bring a book with you everywhere you go that it's permitted. Got a doctor's appointment? Doodle in the waiting room, it'll relax you. Have a late flight? Sketch a bit so you don't slap the people at that desk that can't help the plane is late but we still blame anyway.....But really putting snarky humor aside I really do think that taking a sketchbook with you can be wonderful! I took a drawing book with me when I was on my 15 minute break, so I could work on a picture a bit. If you can take one with you, do it! And don't feel bad if you don't get to use it every waking moment, it's supposed to be fun not a whip to the back.
_________


I hope this was helpful to somebody!


Blessings and Health to all you know and love!


~ Firefly


Useful Links:

Would You Like To Read More Blog Posts Similar To This One? Take A Look At The Official Blog Archive.
Would You Like To See My Drawings? Click here.
Have A Question?
Ask The Firefly!


Tuesday, March 31, 2015

Drawing Practices Over The Weekend

I recently got a sketch-book so I don't have to use up my mixed media paper which costs a lot of money I don't have...to draw stuff that isn't all that good....anyways...yeah...Lol.

I followed Mark Crilley tutorials, 2 lessons in "Figure it out" by Christopher Hart, and some lessons on DragoArt.com (go there with caution, some tutorials are kinda...just kinda.)

Anyways, here ya go!


Enjoy!


I hope this was helpful!


May God Bless You, Your Family, Friend; Along With The Health Of Yourself, Family, Friends, And All Who Know You. ~ Amen
~ Firefly

Useful Links:

Would You Like To Read More Blog Posts Similar To This One? Take A Look At The Official Blog Archive.
Would You Like To See My Drawings? Click here.
Have A Question?
Ask The Firefly!

Wednesday, March 25, 2015

Sketching and Inking Process - Scarecrow Wreath

This is a sketch/inking process for a drawing I'm working on. I'm yet to color it but at least you can see the process.

     Enjoy!


Sketch:


First, I block everything in. The wreath outline and the base for the body, including the head. I also put basic facial guidelines.


Now I add details likes hair and clothes on the scarecrow, and guidelines to other things like the cone flowers in the background and a soon to be sunflower along with a leaf (which I later get rid of).


After a while, I've added more details, fleshed out the face and drawn other things like the acorn and pine cone branch where the leaf was. And put leaves on the other side.


After I drew out everything, I lightened some lines and went over the whole drawing with a mechanical pencil. In so doing I also added a tree/wood pattern to the wreath.


Inking:


First, I used a fine-point sharpie that was older so the ink flow was thinner than if it was new.
I started on the clothes and hair, along with the hay-based hands.


Next, I inked more hair and added the bows, along with the face using a new fine-point sharpie which makes a bigger ink-flow. I inked the outer edge of the wreath with a 1.0 Sakura Micron pen.


I also inked the outside of the edge of the pine-cones with the sharpie then I inked the inside using a 005 Sakura Pigma pen.


After I inked the cone flowers with the new sharpie but the inner-part was inked with the 005 point pen. I also inked the sunflower but I forgot to take a picture.  After all that was done I added the wood with the 005 point pen.


In the end, I added some thicker lines and I erased.


May God Bless You, Your Family, Friend; Along With The Health Of Yourself, Family, Friends, And All Who Know You. ~ Amen


~ Firefly

Useful Links:

Would You Like To Read More Blog Posts Similar To This One? Take A Look At The Official Blog Archive.
Would You Like To See My Drawings? Click here.
Have A Question?
Ask The Firefly!

Wednesday, December 4, 2013

Tip of the Week; Week 7 and 8 - Art Supplies don't matter; Sketching in a process

I totally forgot to post this las weekend the tip of the week! I meant to but I forgot, I'm sorry people!
Forgiveness, please! *puppy eye'd plead*

Okey here it goes:

Week 7; Art Supplies don't matter!


Okay, you are starting to draw, and don't know where to start, right?
Let me tell you where not to start, or even need to end (although graduation from things is benificial!), art supplies! As long as your eraser works and you're having fun it doesn't matter what kind of things you use! Even a pro doesn't need good art supplies.

Mark Crilley did a whole Q&A video drawing with a piece of cooking charcoal and the back of a brown paper bag on a wobbling serface! Not even a table! Don't think you have to have the best of everything to do well!


Source: http://instagram.com/markcrilleyreal


Now when Mark Crilley says, you don't need the best drawing pieces, then I think my point is proven! It's not the tool as much as the artist. I'll paraphrase this art master: "If you have to fight with your tools then they aren't good for you...Use whatever you are comfortable with!" - "Use whatever kind of brand you want, crayola, copic, whatever!" - Yes I heard him say even Crayola, it's not the supplies, it's the artist!

If you're comfortable, having fun, and making nice things in your eyes (puft to critics unless you want the help to be better!) then use whatever you want! Even a piece of cooking charcoal.

If you want to watch Mark draw this picture go here.


Note:  Mr. Mark Crilley is in no way associated with me, I'm using him purely as a reference, all my opinions don't necessarily agree with his or vice-versa.  


Week 8; Sketching In a Process:


When you are trying to sketch, don't get too detailed right from the start! Try doing your basic guidelines, your basic pose (if it's a figure of any kind), your basic rough sketch,* then polish it up later, if you ink you can tweak even yet again in that stage.

* When sketching it helps a lot to have 2 pencils, a normal/sketching pencil for the rough and semi polishing stage, and a mechanical for hardening and darkening the lines you know you want to keep.
But again, do it how you feel comfortable! 

Also if you have a knead-able eraser after you have your perfect sketch you know you like, if you don't want to ink but want the lines lighter now so you can color w/o seeing as many sketchy lines use your knead-able eraser and push it against the sketch, it will pick up the graphite w/o fully erasing the sketch and keeping the inital sketch in place.

I did this on the computer but it applies to any media:

Bigger Version


If you want to see the finished drawing to this sketch/line art, click here.


I hope these 2 tips helped you!


May God Bless You, Your Family, Friend; Along With The Health Of Yourself, Family, Friends, And All Who Know You. ~ Amen


~ Firefly


Useful Links:

Would You Like To Read More Blog Posts Similar To This One? Take A Look At The Official Blog Archive.
Would You Like To See My Drawings? Click here.

Have A Question?
Ask The Firefly!

Wednesday, June 26, 2013

Inking Process - Candy Dancer - Not a Tutorial

Inking Process - Candy Dancer - Not a Tutorial

In this post I will take you through how I inked this drawing.
Hello! I was going to go through in detail how I sketched too but since I didn't think of that until I drew on the clothes which is near the end of the sketching of the person so, I don't really have enough to say "this is my sketch process";  I'll just gloss over it for now.


Sketching:

First I sketched out the girl.

 Then I added some more details to her clothes (lace, ribbon, a pattern etc..), along with a basic background.

 Added some more details, like the bow on the lollipop and the leaves on the rose below the girl and that's the basic idea for the sketching process.

Inking:

I started from the top down in the inking process; Until otherwise stated I'm using a 01 Prismacolor assorted pen in black.  

First I started on her hair on her head, then I inked her face; Moving on I inked her loose hair then her shirt area of her dress, and the bow.

Next I inked the first two layers of her dress and her waist.
This part is simply stated but one of the most time consuming parts of the process; I inked the last layer of her dress, notice how it matches the top part of the dress. 

Next  I moved on to inking her legs, feet, arms and hands. 

Now on to the background: I inked the background with a 03 Prismacolor assorted pen.


I fixed up the outlines of parts of the dancer girl with the 03 pen to make it have more depth.
 And that's my inking process!  (I used GIMP to make the image pure black and white without all the shadows of the camera.)


I hope this has been at least a basic idea to help you get started if you don't know how, or at least semi interesting, it's not quite the verbal inensity that you might have expected with explanation but I hope it's good for something. 


May God Bless you, Your Family, Friends; Along With The Health Of Yourself, Family, And All Who Know You. ~ Amen


~ Firefly


Useful Links:

Would You Like To Read More Blog Posts Similar To This One? Take A Look At The Official Blog Archive.
Would You Like To See My Drawings? Click here.

Have A Question?