Moko-Young's Factoid Firefly album on Photobucket
Showing posts with label Sharpie. Show all posts

Saturday, March 12, 2016

Some Drawings I've Done Over The Past Few Months

Okay I know the middle or early week would have been better but I'm a lazy jerk and never got the nerve to actually write a decent article so we get these pieces of artwork instead. I'm sorryyyy!!!

Okay here we go, some of these are going to be mentioned in future posts. I'll say a little about some of the artworks. And yeah...it'll explain itself.


Monochrome inked with brown pen and colored with watercolor.


Sunflower with bees, colored with sharpies and colored pencils, on mixed media paper the background is watercolor and the outlines are with inking pens and a sharpie fine tipped marker.


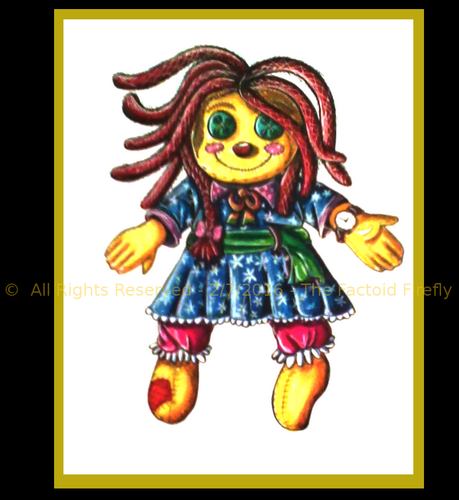
These first two are done on printer cardstock using Prismacolor multi-liners and Sharpies to color. (The light blue from the dress is a Prismacolor marker [I only have 3 of those]).


This next one is I believe the first drawing I've ever colored not in monotone while having the outlines in brown. Colored using watercolor, crayola markers and soft pastels on mixed media paper.


I was watching Jake Parker videos while drawing these from photo reference. I didn't aim for realism just a likeness of the different leaves. The top row left to right: Oak, Ash - Botton Row Left to Right: Maple, Birch.
Colored pencil, pen, soft pastel on sketch paper.


A pen drawing using color inking pens and IDentipens all from Sakura brand.

Opaque watercolor painting on mixed media paper.


Colored pencil drawing on watercolor paper with a watercolor background.


I have drawn more but I think that's enough for now.

I hope you enjoyed these drawings, if you did please +1 on google plus and show other people.
Thank you!


~ God Bless~

~ Firefly

Friday, September 11, 2015

Inking Tips: Solid Vs Loose Lines

In this post we're going to talk a little about inking. I've spent a little more time with pens and ink so in my tests and drawings I've learned a few things that I'd like to share. I will sperate this in to two sections: Solid vs Loose Lines and Texture/Shading. This isn't extensive but I hope it's helpful in the long run!

Note: When I say inking, I mean art pens, not a brush or fountain pens, though these things might apply to those as well. I am talking about art pens like Prismacolor pens or Sakura Micron (or pigma) pens (or other pens like them, there are other brands as well).


So, without any further ado, lets begin!


Solid Vs Loose Lines: 


I've learned in recent months and really over the year that just because something is outlined that doesn't mean that the lines themselves have to be totally hard in nature. For example, if I drew a cartoon cat face I could ink with hard lines and you can tell he's fuzzy, or I could ink with looser more fluid lines not following the exact curvature of the face and he could almost appear to feel furry. He's still a cartoon but he's got more detail.

Neither one is better than the other but they are different. However if you like to color with a looser medium like watercolor, or a more detail oriented medium like colored pencils (pencil crayons in some countries) then maybe the looser style is more fitting. Of course it depends on the subject matter.

In the drawing below the inking on the character is loose and the inking on the poppy flower is solid. Knowing when to combined styles is key to making a picture coherent and not just a rambled mess.  Another thing to notice in this drawing is that there are different line thicknesses. The pattern on the dress has thing lines the fur on the character is thicker as well as the outline of the flower itself. It's all about finding what looks good.


Combining styles, knowing when, and creating something nice comes with practice and also some knowlage of yourself. Your style might be different than mine, so as I say these things it's not THE WAY it's just how I see things, take what's useful and ignore what's not....Anyways, moving on!

Texture and Shading:

There are many ways to add texture and shading while using pen, it can be VERY time consuming but it is well worth the effort.

 Within the styles there are many things you can do, a few are:  Hatching, cross-hatching, circles, scribbles, lines, and dots. Each of these have their place and are great for texture and shading, as well as fun patterns if you like artwork that isn't a subject oriented but an abstract style.

As a few examples I drew grapes, a tulip and an eye to show some of the things you can do with ink.


Grapes:


With the grapes I added a lot of black areas, these show contrast, three-dimensionality , and also some shading. I also did cross hatching on the grapes and the leafy part as well as scribbles on the grapes that would be more shaded. The section that says highlights refers  to those little parts I "roped off" that show where light would be hitting the subject.


Tulip:

For the tulip, I also did some contrast with the highlights and cross-hatching, but I also added some lines along the edge of the flower following the curvature, it's a more subtle looking approach to shading lovely for "softer" shadows.  I also added cross hatching in the more shaded areas.


Eye:

The eye shows fluidity with the eye-lashes, making fast but calculated strokes can make your artwork look much more "alive". I also used lines to the hair of the eyebrows, also using fast movement to make the hair look more fluid and textured. Highlights as  well on the white of the eye (since it's really off white and moist you would have a highlight sometimes) and the iris itself.


Another thing you can do with ink is make areas black (or dark if you're using a colored pen) then go over it in white. In this picture I colored the edge of the butterfly-wings black then went over them with a white pen. - You will also notice that I used different pen sizes as well as did lots of contrast black. Also if you look at the picture you'll see I added dots which add texture and a pattern to the butterfly.


In this drawing you can see I used hatching to texture the sash, circles in the paisleys and scribbles to show the shadow of the neck. There's also some contrast shading too.


Overall these are some things I've learned and I hope they help you as well!
Thank you for reading and God bless.


~ Firefly

Tuesday, April 21, 2015

More Sketches!

Here are some more practices....These are over the past 2 weeks...or so. I hope anyone who wants to look enjoys these! :3


Sketched with a normal pencil then colored with soft pastel. After Ink is added (a sharpie ultra fine point). The horses I drew from memory the birds and cats I followed tutorials.


Random doodling with oil pastels.


 The apple and pear I think are both soft pastel and colored pencils. Other stuff is a sharpie pen.


Messing with baby oil and oil pastels with colored pencils.


This is more like a painting than a sketch but I was practicing so I guess it counts.
I followed a tutorial in a book for drawing the Cosmo, the rose is just how I draw a rose...My watercolor pencil skills almost ruined this, I just took over it with Raphael watercolors instead and went with it. - Watercolor, white pen, pencil for sketching, kneadable eraser.


May God bless all you and all you love as well as they health of yourself an all that know you! ~ Amen


~ Firefly


Useful Links:

Would You Like To See More Of My Drawings? Click here.
Would You Like To Read My Blog Posts? Take A Look At The Official Blog Archive.
Have A Question?


Wednesday, March 25, 2015

Sketching and Inking Process - Scarecrow Wreath

This is a sketch/inking process for a drawing I'm working on. I'm yet to color it but at least you can see the process.

     Enjoy!


Sketch:


First, I block everything in. The wreath outline and the base for the body, including the head. I also put basic facial guidelines.


Now I add details likes hair and clothes on the scarecrow, and guidelines to other things like the cone flowers in the background and a soon to be sunflower along with a leaf (which I later get rid of).


After a while, I've added more details, fleshed out the face and drawn other things like the acorn and pine cone branch where the leaf was. And put leaves on the other side.


After I drew out everything, I lightened some lines and went over the whole drawing with a mechanical pencil. In so doing I also added a tree/wood pattern to the wreath.


Inking:


First, I used a fine-point sharpie that was older so the ink flow was thinner than if it was new.
I started on the clothes and hair, along with the hay-based hands.


Next, I inked more hair and added the bows, along with the face using a new fine-point sharpie which makes a bigger ink-flow. I inked the outer edge of the wreath with a 1.0 Sakura Micron pen.


I also inked the outside of the edge of the pine-cones with the sharpie then I inked the inside using a 005 Sakura Pigma pen.


After I inked the cone flowers with the new sharpie but the inner-part was inked with the 005 point pen. I also inked the sunflower but I forgot to take a picture.  After all that was done I added the wood with the 005 point pen.


In the end, I added some thicker lines and I erased.


May God Bless You, Your Family, Friend; Along With The Health Of Yourself, Family, Friends, And All Who Know You. ~ Amen


~ Firefly

Useful Links:

Would You Like To Read More Blog Posts Similar To This One? Take A Look At The Official Blog Archive.
Would You Like To See My Drawings? Click here.
Have A Question?
Ask The Firefly!

Tuesday, May 28, 2013

Inking Pens, Which Brand Should I Get?

Inking Pens, Which Brand Should I Get?


Many people myself included enjoy to draw with a hard-lined style, but when starting out most of us have had the question “Which Pens Should I Get?”. Today I will give you an overview on the different pens I have used and you can come to the conclusion yourself which pens you'd like to get!


Sakura Brand:


Sakura is a Japanese Company headquartered in Japan, they make an array of art and drawing supplies, I personally am a big fan of their Micron and Pigma-Sensi Pens along with their white gelly roll pen!

Micron:

The Sakura Micron Pens are make specifically for inking They Come in Sizes ranging from 0.05 mm – 0.8mm giving you a great vastness in depth if you use the pens correctly. Their tips are a cylinder shape being round with a flat bottom.
Image From "http://www.discountart.com"

Tip Sizes:
    • Pen Size 005 = Point Size 0.20 mm
    • Pen Size   01 = Point Size 0.25 mm
    • Pen Size   02 = Point Size 0.30 mm
    • Pen Size   03 = Point Size 0.35 mm
    • Pen Size   05 = Point Size 0.45 mm
    • Pen Size   08 = Point Size 0.50 mm

    There are many colors and they are very useful if you don't want to be limited to black, I believe they aren't multiple sizes however and are limited to 0.1mm.

    Microns come in packs/sets of different styles, like 
    • Sepia
    • A pack of all the sizes listed above
    • A Manga-Comic Pro pack complete with 00.5, 0.3, 0.8 along with a Pigma brush pen and Pigma graphic 1 pen (1.0 mm) and a mechanical pencil, 0.7 mm lead size (extra leads and erasers not included)

    There are other packs and lists all that can be found here.

    They are marketed as permanent and waterproof.

    Pigma Sensi:

    Pigma Sensi are closer to a marker type tip ranging in sizes from 0.1 mm – 1.0 mm they are very nice to ink with, they're the first real inking pens I used.
    Image From "http://cdn.dickblick.com"

    Tip Sizes:
    • 0.1
    • 0.3
    • 0.5
    • 1.0

    Pigama Sensi's are supposed to be water proof but when I played with watercolor paint when I was younger they seemed to bleed a bit but they might not have been totally dried; still it's something to keep in mind if you ink before painting to color. The Pigma Sensi Pack/Set has All Sizes Said above plus a mechanical pencil and a Sakura brand foam eraser.

    These cost about $10 for the pack mentioned above. (Prices Vary By Store)

    Image From "http://www.quickship.com"

    White Pens:


    I've bought two different pens that are white that are Sakura Brand, Gelly Role White Pen, and a White Pen Touch, I personally prefer the Gelly Role Pen over the Pen touch.

    Gelly Roll:

    The Gelly roll is very smooth once you get it moving but considering I use a lot of medias it gets a little picky on wanting to go totally smooth but it looks fine once you get it to move, this is good for smaller details and about 0.99 cents in Micheals (Prices Vary By Location) per pen.
    Image From "http://www.qsupplies.com"
    If you need to highlight something with a very big area you could use white craft paint or go with...

    Pen Touch:

    Pen touch is a pump type pen and gets very messy, I'm sure if you practice with it you can make it work for you but it can be irritating, but it can't hurt to try it out if you want.
    These are more expensive about 3-4 dollars in Micheals.


    Sharpie:

    Sharpie as an inking pen is a good option if you want to start cheap but effective, there are a few non-numbered sizes to choose from, even a retractable version of the fine point. Y
    ou can also buy a white pump pen much like the Sakura Pen Touch, but this pen I found is less messy, it's oil based but costs about $4.00 if you include.

    Image From "http://theartsupplystore.co"
    Tip Sizes:

    • Ultra Fine – about 0.1-0.2 mm
    • Fine – about 0.8 mm
    • Normal – about 1.0 mm
    • Super – maybe 2.0mm; Or a Chisel Pointed tip.

    Note: Size measurements are my personal estimates.

    Sharpie does have a scent that if you have hyper allergies or are super sensitive might bother you, so that might be good to keep in mind. Sharpies also bleed through paper very fast so make sure if you draw in a drawing pad or a sketch book to keep a paper under the paper so the next page of your book isn't stained or marked, even if it's a wet media paper it's better to be safe than sorry!
    Sharpie Sells other pens and markers varying in price, size, and color.
    I used these when I was first starting out, and if you are super new you might wanna start cheap and work your way up as you get better.

    Ultra Fine Tip Marker, $1.54 from Hobby Lobby (Prices vary by locations)


    Prismacolor:

    The only pens I own and know of from Prismacolor are called “Prismacolor Premier Assorted Markers” They come in the following sizes:

    • Image From "http://www.amazon.com/"
      00.5
    • 0.1
    • 0.3
    • 0.5
    • 0.8
    • B – Brush Pen
    • C – Chisel Tip

    I've been using these since about October of 2012 and it's almost June of 2013 and they still work well, all except the 0.05 one, that one seemed a little dull from the start though; they work a long time and are very smooth, they don't bleed much even on dry media paper but I still say put the paper under the page just to be safe.

    No scent, permanent and waterproof.

    Tips are very similar to the Sakura Micron Pens.

    I bought them (well my mother did Haha!) for $10.99 on sale; On Amazon they are $15.99.
    I also use a Prismacolor marker (an actual coloring marker) on the “fine” edge (about 1.0 mm) for the super fat outlines for paintings like Potted Grace.

    Note: Sandford Products Owns Both Prismacolor and Sharpie Brands.

    Ball-Point Pens:

    Image From "http://mojosavings.com"
    In general I'd say they're okay, not good and not terrible, but if you use markers the black will bleed in to your colors because ball-point pens aren't generally permanent, if you use colored pencils its better, but if you want to do a design like a wood design over colored pencil it'll be nearly impossibly because the pencil is too waxy for the ball-point pen to glide smoothly. If you buy a pen from a good company like Pilot then it'll be smooth but if you touch it it'll most likely smudge.
    There are people like Zkos who draws with a ball-point but he doesn't color his drawings, other people do and it's on the computer, if you want to color your drawings on the computer with a program like GIMP, or MyPaint then ball-point pens leave you no real issues. If you want to not color anything in but make different colored outlines then ball point pens are fine just leave them to completely dry before you erase pencil if you use pencil first or else they will smudge.

    If you want to try them out you can get packs of 15 or more in a dollar store for a $1.00 (tax not included), but it's normally just black or a mix of black, blue, and red. Mixed colors aren't as common but still out there, a higher quality brand like Pilot is better if you want good ball point pens.


    I hope this has helped somebody!


    May God Bless You, Your Family, Friends, Along With The Health Of Yourself, Family, And All That Know You. ~ Amen


    ~ Firefly 


    Useful Links:

    Interested in my art? Click Here To See The Official Factoid Firefly Drawing Archive.
    Would you like to read most posts after the similitude of this one? Click Here.

    Have A Question?
    Ask The Firefly!